Printing a Directory with the FaceBook feature.

Printing a Directory with the FaceBook feature PremiSys ID.
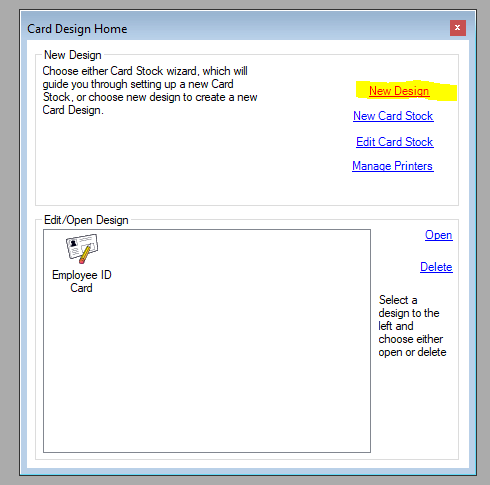
- Go to Tasks>Card Design Home. Click on New Design.
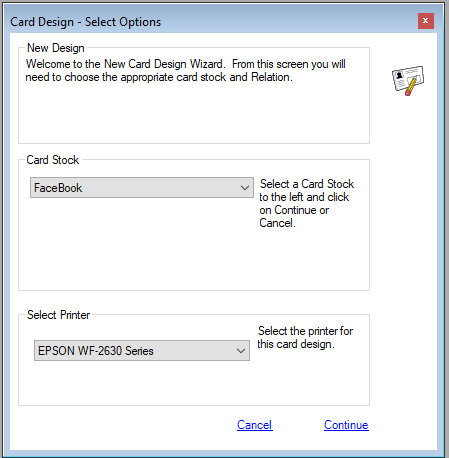
- Create a card design using the FaceBook card stock. Select FaceBook as the card stock and select your printer. Click continue. (The FaceBook card stock can be edited to reduce the number of cards printing on an 8 ½ x 11 sheet of paper. Maximum of 12 is default).
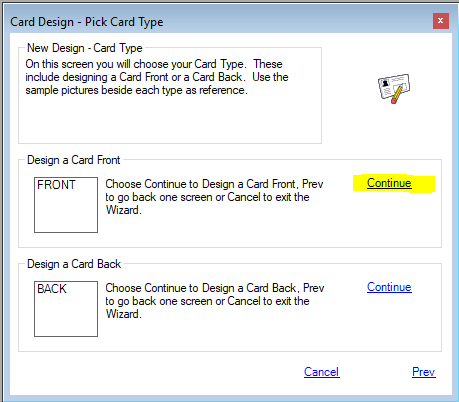
- and Select Continue on Front.
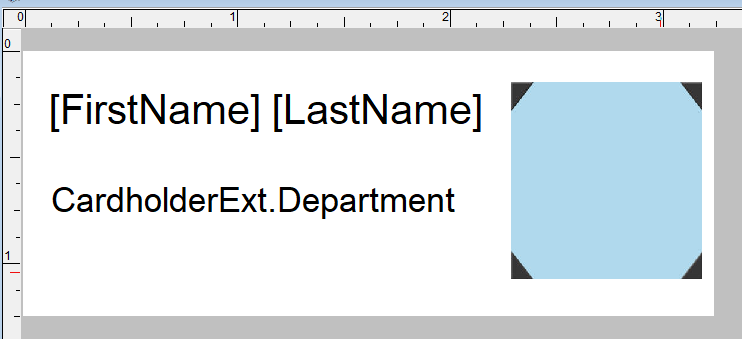
- Design your layout. Place the items you would like in the FaceBook, most customers have it setup with First Name, Last Name, Department and Photo. Click here for Badge Design Videos
.
- Save the FaceBook Card design.
- To print, open the Navigator and click on the Search button.
- Enter the search values.
- Change Use Search Results For: to Print Batch.
- Click Search button.

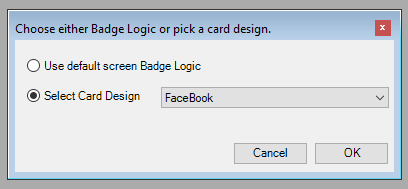
- In the window that pops open mark the radio dial Select Card Design. Then from the dropdown box choose the FaceBook card design that was created. Click OK.
- Open the Card Print Manager from the bottom right of the Taskbar by the clock. All of the search results will be in the Card Print Manager waiting to print.
- Click Select All.
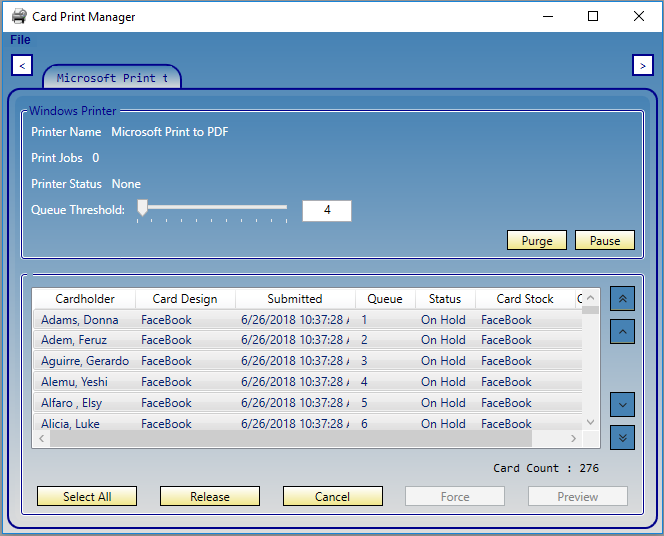
- Click Release. All of the print jobs will print to your printer. If you are using the default Facebook card stock you will print 12 records per page. Depending on the version you have you may have to force the last few records to print. The program is looking for 12 records before it prints a page. If the last page has less than 12 records to print, click select all in the print manager and then select Force. This will force the last few records and print a partial page.