Connecting a Webcam in PremiSys

Connecting a Webcam in PremiSys
1.) Plug in the Webcam USB cable to the PremiSys computer.
2.) Wait until it shows the device is ready to use.
3.) Login into PremiSys
4.) Click the Navigator Icon on the top toolbar. 
5.) Open a record. Right-click the photo box. Click “Select Capture Source…” 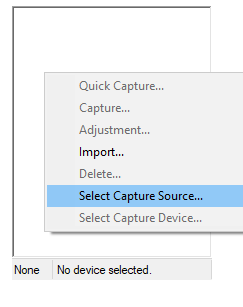
6.) The Device Source Selection window will pop up in this menu select “Webcam” and click “OK" 
7.) Right-click the photo box again. Click “Select Capture Device” 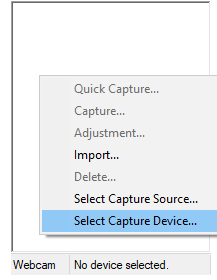
8.) The Video Source Selection Window opens up. Highlight your webcam and click “OK” 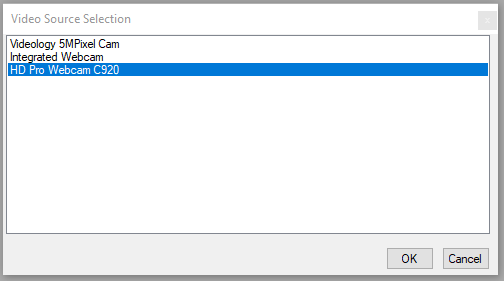
9.) You will notice the Photo box now has Webcam and your camera listed
10.) Click on the photo box on the cardholder record. The “Video Capture” window will open. If the image is showing in the Live Preview the camera is working.
11.) Click “Take Picture” if you are satisfied with the image click “Use Picture” if you do not like the image click “Take Picture” again. This will place the new image on the “Use Picture” side 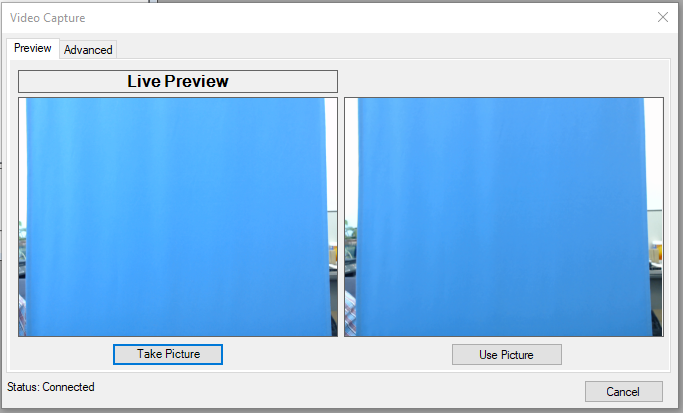
12.) The Picture Adjustments window opens up. You may crop the image by clicking the lower-right corner and dragging the crop box around your subject. Click OK and the cropped image will be placed into the cardholder record.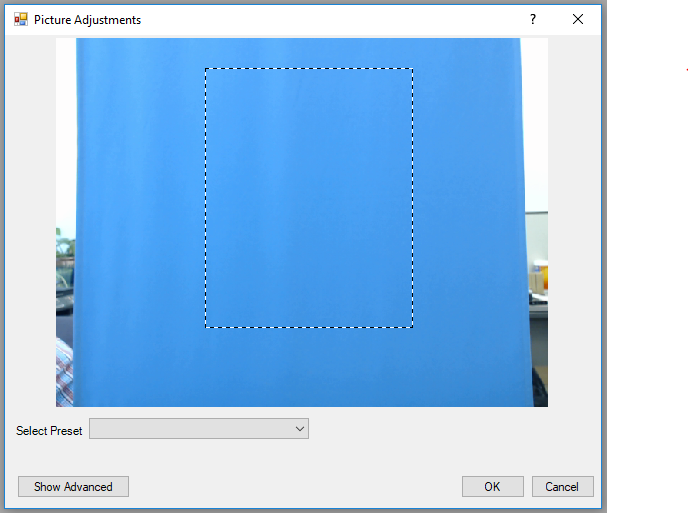
13.) Click the Save Icon on the toolbar at the top. ![]()
14.) The Webcam is now configured to work with PremiSys.