Setting up a keypad reader to work in PremiSys

Enabling a Keypad reader to work in PremiSys.
There are four components of setting up a keypad reader.
- Setup the PIN Digits in the Card Database
- Enable the reader to accept PINs
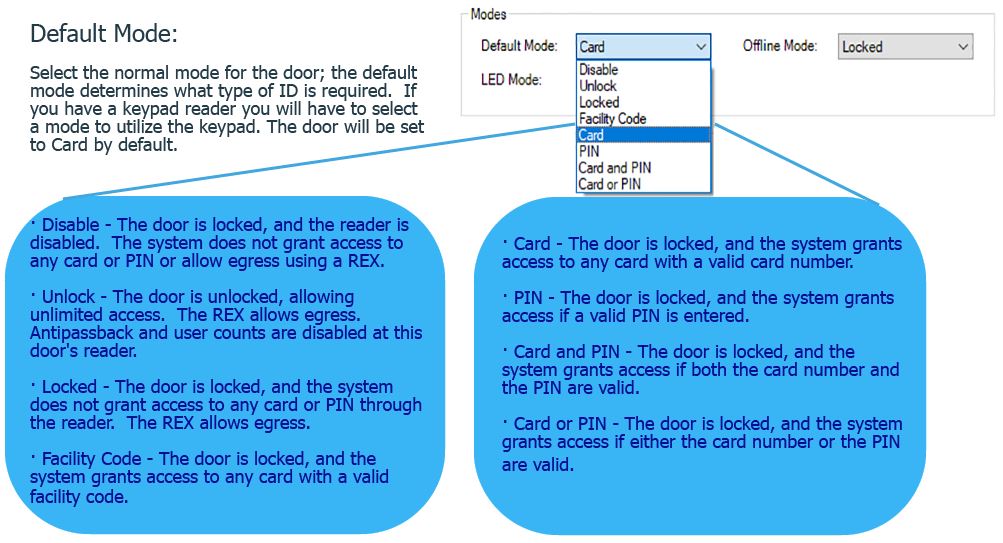
- Set the Door Mode - for example, PIN only, Card and PIN, Card or PIN.
- Assign PIN to Cardholder(s)
You will have to enable the PIN digits in the Cardholder database that gets downloaded to the controller.
Set up Keypad reader in PremiSys
1. First you will check what card database is assigned to the controller. While logged into PremiSys, click Tasks - Hardware Configuration - Hardware Tab - Right-click the Controller and select edit controller.
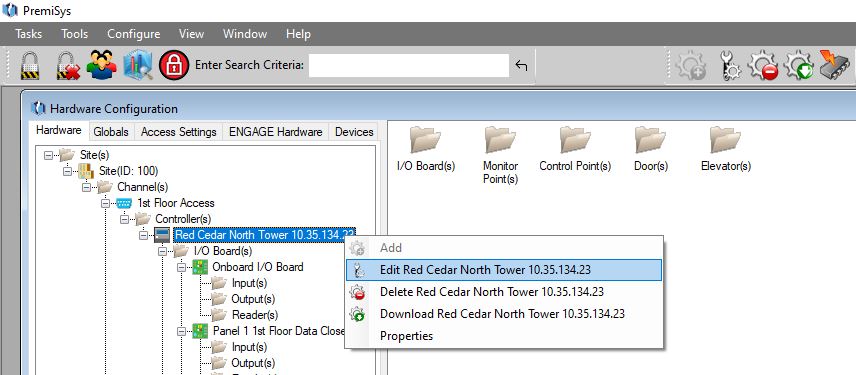
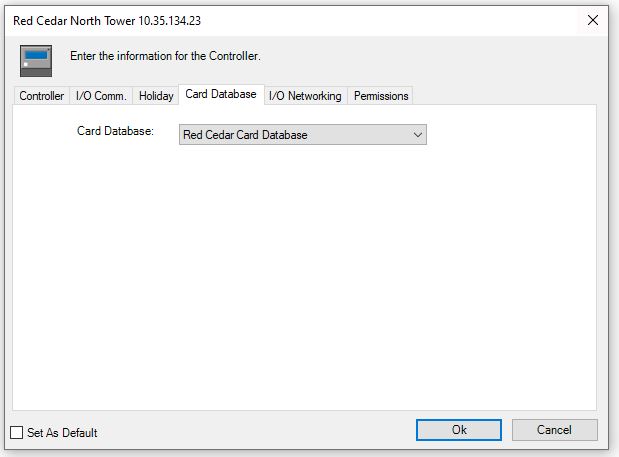
2. The Controller configuration window opens up. Click the Card Database tab. Take note of the Card Database name and click OK.
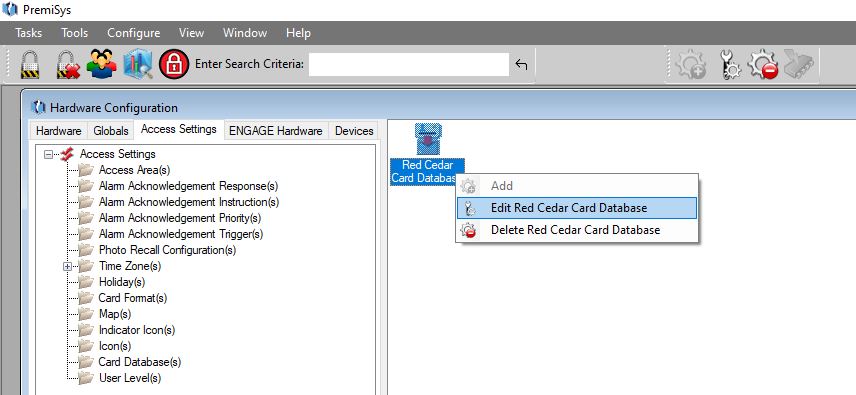
3. Now you need to make sure to enable PIN digits in the card database. Open the Card Database by clicking Tasks - Hardware Configuration - Access Settings Tab - Card Database(s) folder. You will see the Card Database you just took note of, right-click the card database and select edit.
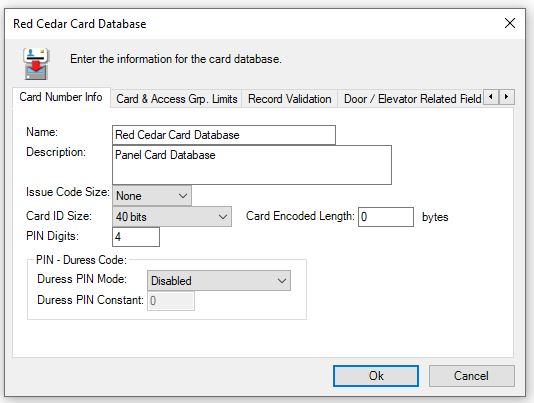
4. The Card Database Window opens up, on the Card Number Info Tab, look for PIN Digits. Enter the number of digits you would like the system to use for PINs. Using 4 digits is pretty standard, the max is 15 digits. Click Ok to close the Card Database window.
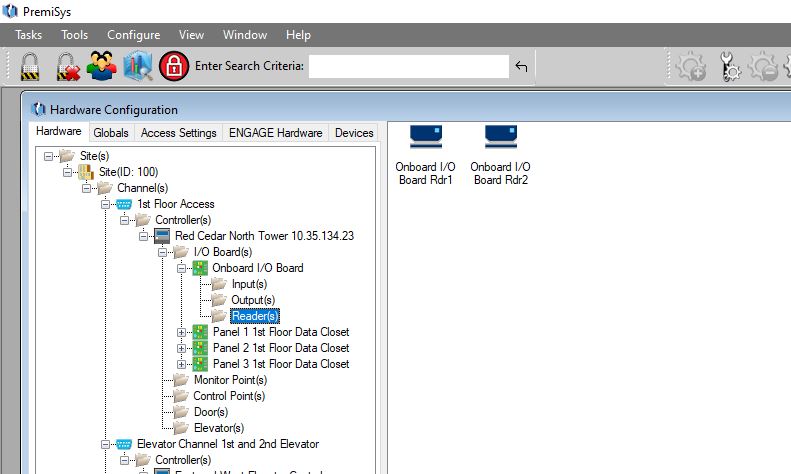
5. Enable the reader port in PremiSys to use a keypad. While logged into PremiSys, click Tasks - Hardware Configuration - Hardware Tab. Expand the tree. Expand it and click the Readers folder under the I/o panel the reader is connected to. On the right-hand side of the window, you will see the readers. Double-click to edit the reader you would like to enable.
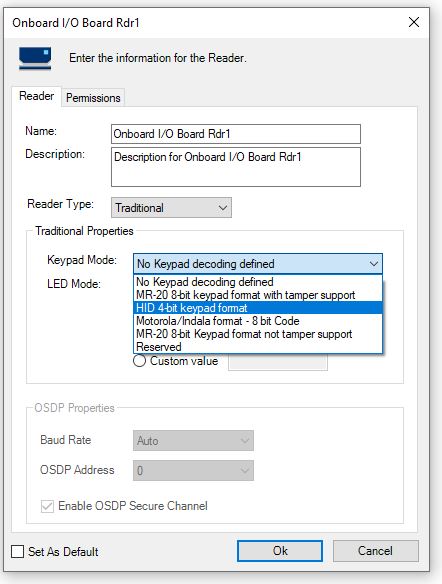
6. The reader properties window opens. Click the Keypad Mode dropdown box, and Select HID 4-bit keypad format. Click OK.
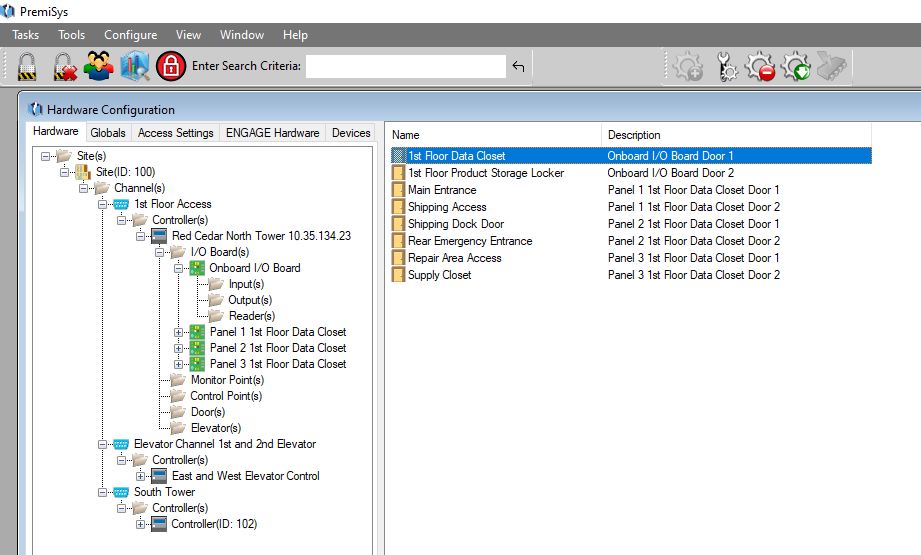
7. Next you will set the door mode on the door. You need to edit the door by clicking, Tasks - Hardware Configuration - Hardware Tab. Expand the Door(s) folder under the controller you are working with. Double-Click the Door on the right side that you would like to change the mode on.
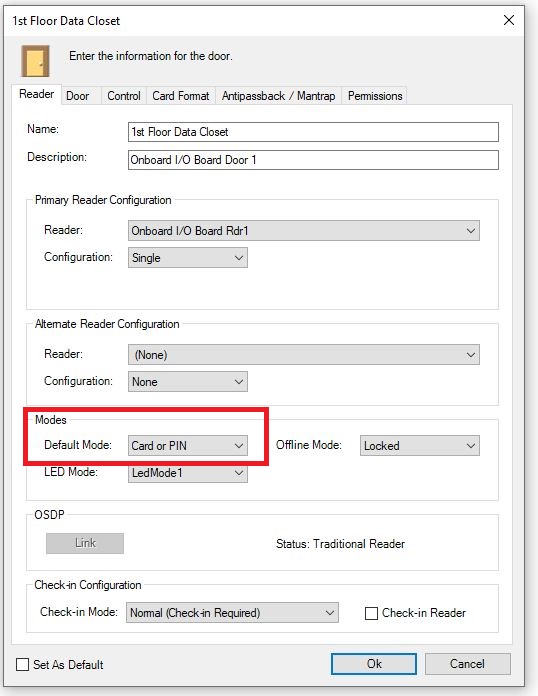
8. The door properties window opens, under the modes section on the reader tab, click the dropdown for Default Mode: Select the mode. Click Ok to close the Door properties window. The door is set for Card by default. You are able to configure the door for Card, PIN, Card and PIN, and Card or PIN. Click the default mode dropbox and select the mode you would like to use.
There are multiple door modes you may choose from. The image below describes these door modes.
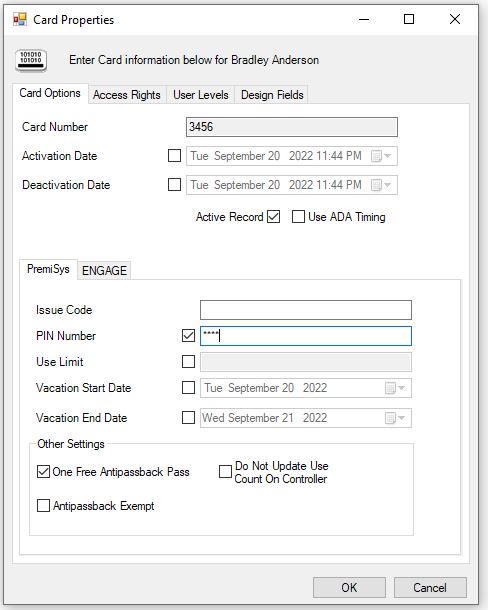
9. Add a PIN to a Cardholders record - Open the Navigator and open a cardholder record. Right-click and select edit card on the card number in the card configuration section at the bottom. The Card Properties window opens up. Under the Card Options tab click the check box next to PIN Number and enter the PIN for that cardholder. Click Ok to close the Card Properties window.
10. Click the Save icon at the top to save the changes and send them to the panel.
![]()