How to setup Check-In Reader in PremiSys

Check-In Reader Setup and Configuration
- You must be using PremiSys version 4.6.104 or greater.
- The Check-in reader feature does not support ENGAGE (Online or Offline) doors.
- The Check-in reader feature only supports Mercury based doors.
- EP controllers must have 1.17.6 or greater firmware to support the Check-in feature.
- To increase Check-in reader processing performance, enable ‘Log Early’ door control option for Check-in.
Check-In Reader Configuration
1. The 4.6 version of PremiSys must be installed.
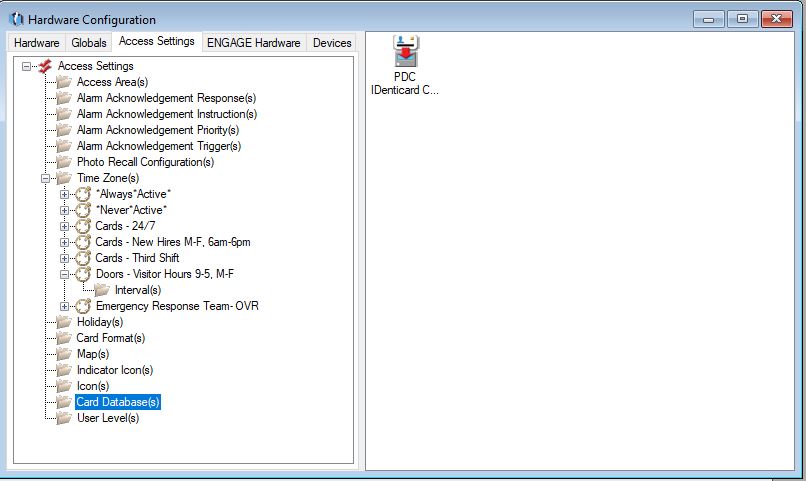
2. Login to PremiSys and click Tasks>Hardware Configuration - Select the Access Settings Tab.
3. Click the Card Database(s) folder.
4. Double-click the Card Database associated with the controller where you would like to set up the check-in reader. (Edit the controller and select the card database tab to see what card database is configured for the controller.)
5. The card database window opens. Select the Card & Access Grp. Limits tab. Will need to select the Use Access Exception List (See image below) and click on the OK button to save.

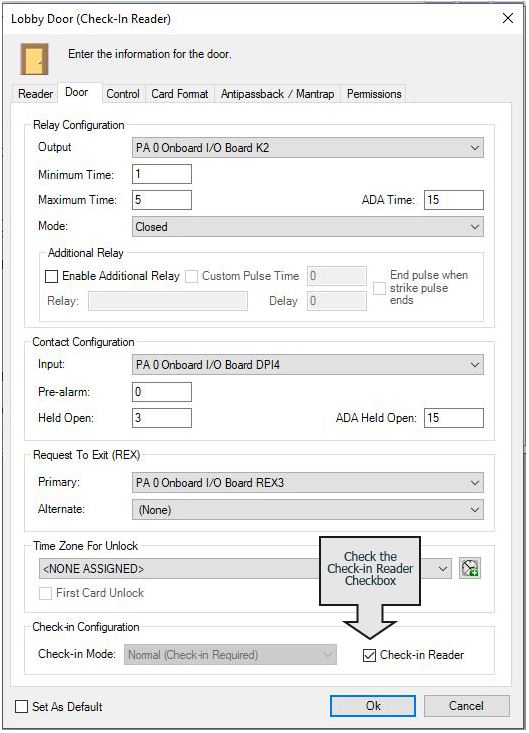
6. Select the Hardware tab of the Hardware Configuration dialog. Find the door(s) you want to specify as a Check-in reader. Select the door to edit its properties.
7. In the door properties select the Door tab. Find the Check-in Configuration group and select Check-in Reader. Select OK to save. Repeat for other doors to be Check-in Readers. (see image below)
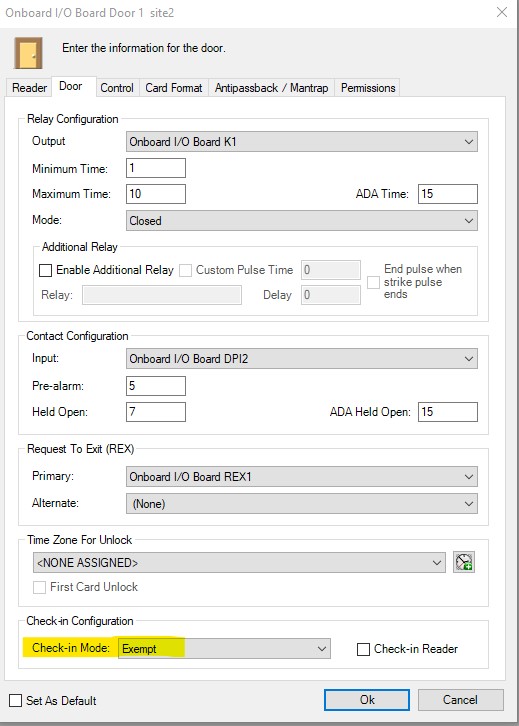
8.If there is a door part of a Site that you want exempt from using a Check In, edit that door. Go to the Door tab and choose from the drop down box for Check-in Mode ‘Exempt.’
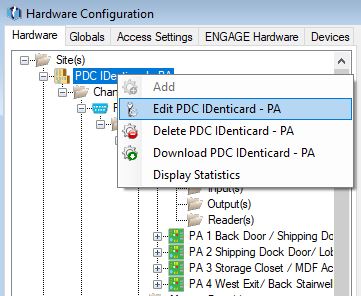
9. After you have defined all check-in and exempt readers we will have to enable them to the site. (Note you may have multiple sites and will have to edit each site.) In the Hardware configuration window click the hardware tab.
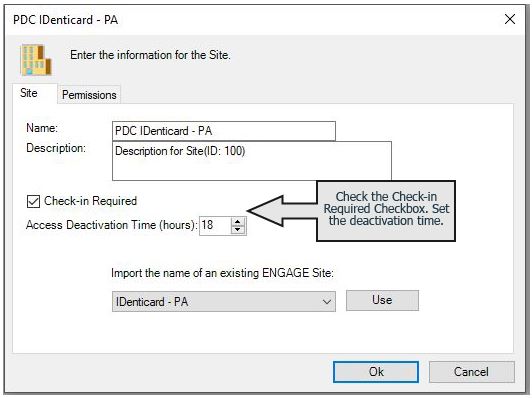
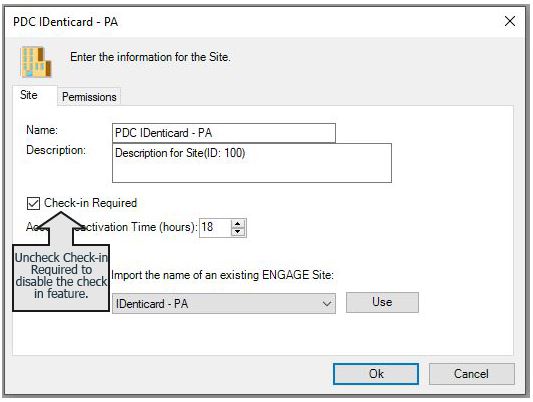
10. Right-click your site and select Edit.
11. In the Site Properties window select the Check-In Required checkbox. Now set the Deactivation Time. The default is 18 hours. This means the card will lose access after 18 hours and will have to go through the check-in process again to make the card active.
12. Finally, download all controllers under the site to update. The check-in reader is setup and configured.
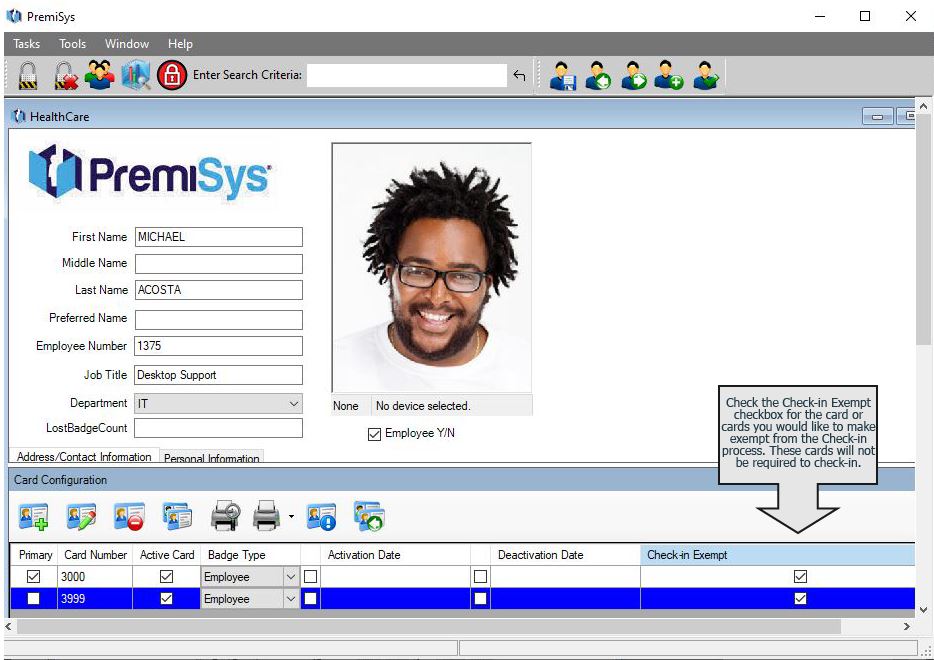
Exempt Cardholder Option
You can setup a cardholder to be exempt from the check-in process. We will have to modify the existing screen design. Here is how its done.
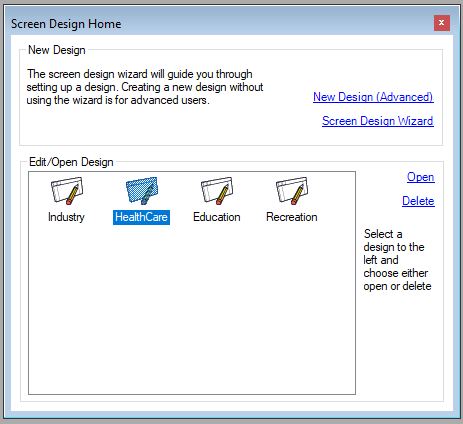
1. From the Task menu select the Screen Design Home option.
2. In Screen Design Home dialog select the screen design that is used for your system and Open.
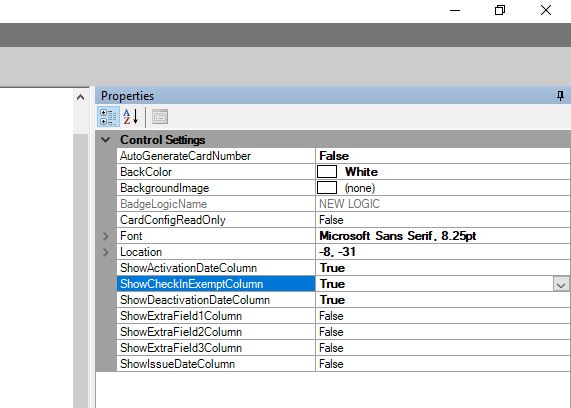
3. In the Screen Designer locate the Properties option (see image below). Find the Property ShowCheckInExemptColumn and change to TRUE. Save design and close designer.
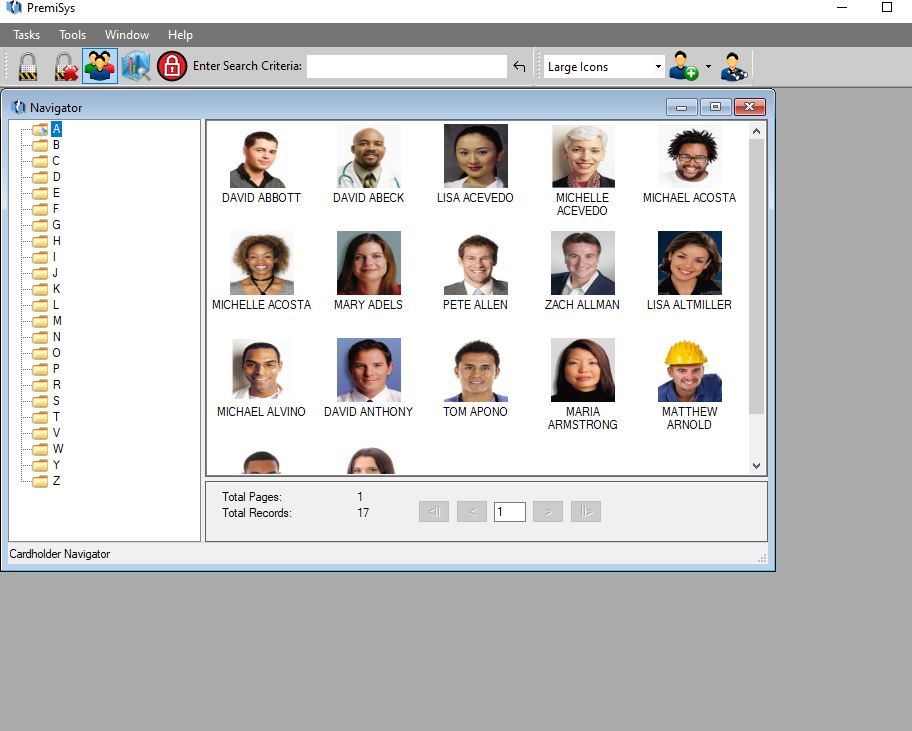
4. Next, Open the cardholder Navigator from the PremiSys toolbar. Open an existing cardholder or create a new cardholder.
5. In the cardholder record under the Door Properties options will have new property called Check-In Exempt. Selecting this property will exempt this card for Check-in evaluation. (Note, if the cardholder has multiple cards, will have to exempt each card. Once the cardholder and card(s) are configured. Save cardholder record by clicking the save icon. The cardholder will now be exempt from checking-in at the check-in reader.
Disable Check-In feature
From the Task Menu select Hardware Configuration.
In the Hardware Configuration dialog box, select the Hardware tab.
Select the Site(s) that is configured for Check-In reader support and open to edit properties. Unselect the Check-In Required property and click the OK button to Save.
Reset the controller through PremiSys and download to it.
The check-in reader feature is now disabled.