PremiSys Holiday Setup Video & Half-Day Holiday Setup

PremiSys Holiday Setup
Adding Holidays
Any day in the calendar can be a holiday. In addition to the auto-generated holidays, you may need to add company-specific holidays, scheduled plant shutdowns, mandatory vacations for personnel, etc.

Auto Generate Holidays
To save time, IDenticard Systems recommends that you allow the PremiSys ™ software to autogenerate holidays for the current year that correspond to the United States Federal holidays (and a few extras).
The holidays generated are year-specific, last one day, and have "System Generated" as their type. You may edit any autogenerated holiday to do the following:
- Include more days
- Change its type.
Follow the steps below to auto-generate holidays.
- Click Tasks and then Hardware. Right-click Holiday(s) in the Access Settings tab. A shortcut menu of options
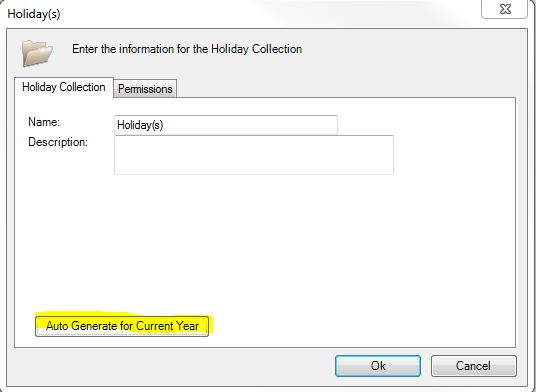
appears. - Select "Edit Holiday(s)." The Holiday(s) window opens.
- Click the "Autogenerate For Current Year" button. The text in the button changes to "Will Appear Upon Closing."
- Click "OK." The Holiday(s) window closes and the ACCESS SETTINGS folder is
highlighted in the tree. - Click the HOLIDAY(S) folder to display the system-generated holidays in the right pane
of the Hardware Configuration window. - Delete any system-generated holidays that you do not need. Right-click the holiday
icon to open a shortcut menu and then click the "Delete [name of holiday]..." option. - Go to the Hardware tab and edit the controller you would like to add the holiday.
Adding Holiday(s) to Time Zone
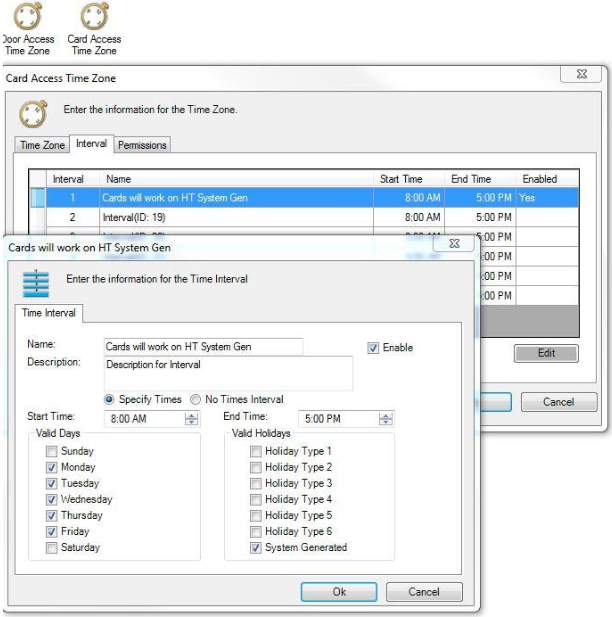
- In the time zone, there are intervals. On each interval, there are check-boxes for Holiday Types. Go to
Hardware Configuration>Access Settings tab>Time Zone(s) folder. Edit the time zone. Go to the Interval
tab and edit the Interval. - You will want to have separate time zones for door schedules and for card access. A door time zone is
used for the door schedule if doors will need to remain locked on a holiday. A card access time zone is
used as part of an access group if the card still needs access to that door on the holiday. - For a Time Zone applied to a door where the door is to remain locked on holidays, the Holiday Types on
the Interval(s) is to remain unchecked.

- For a Time Zone applied to an Access Group where cards will still have access during a holiday, the Holiday Types need to be checked for the Interval(s) corresponding to the Holiday Type on the holiday that was created. The following example shows that if the holiday that was created is a System Generated holiday type then the card will work.
Half Day Holiday
It may be necessary to create holidays for partial-day closures, such as an afternoon off. Follow the steps below to create all holidays for your system, whether for full or partial days. When the holiday is enabled in a time zone interval, the interval determines the times during that day that the holiday is in effect, whether a full day or a partial day.
For this example create a Holiday where a door will be unlocked for only a half day rather than a full day on a timezone configured for that door.
- Go to Tasks>Hardware Configuration>Access Settings
- Create a Holiday. Give it a Holiday Type 2.
- Open the timezone on the Access Setting tab that is applied to the door. Go to the Interval tab.
- Edit Interval 2. Make Start Time 8:00 AM and End Time 12:00 PM. Select Valid Days and check the box for Holiday Type 2.
- Check the Enable checkbox. Hit OK.
- Go to the Hardware tab and edit the controller the door is on.
- Go to the Holiday tab. Assign the holiday created to the controller. Hit OK.
- Click the Maintenance button. Click Reset Controller. Click OK. Click Close.
- Download to the controller.