How to Add a User in PremiSys ID

Adding a user in PremiSys ID
In PremiSys, there are two ways to create user accounts: Application or Active Directory.
Create a user with Application
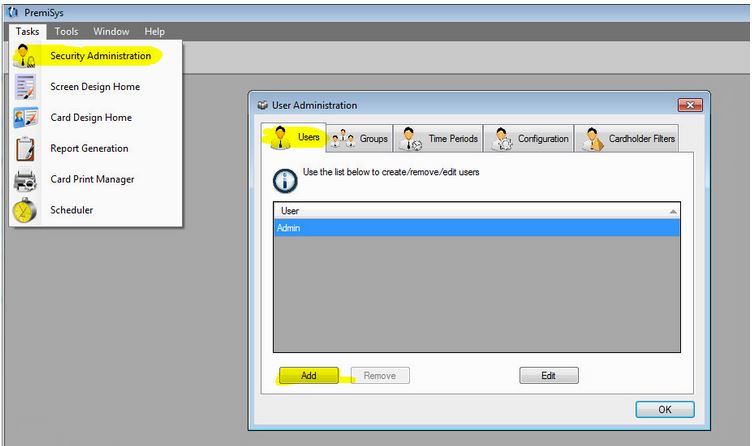
Application is done by default. To create user accounts under Application, start by going to Tasks > Security Administration. Then, on the Users tab, click Add.
In the following window, click on the Group Membership tab and then check the desired group for the User.

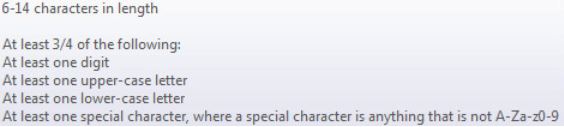
Click back to the User Information tab and fill out the Username, Full Name, Password and Confirm Password Fields. Make sure to also select a Default Screen Design. When typing the password, make sure the Password and Confirm Password Fields match and that they conform to the following requirements:
Then Click OK and then OK again. Log off of Premisys then log in as your new user to test it out.
Create a user with Active Directory
To add users using Active Directory, start by going to Tasks and Security Administration. Click on the Configuration tab and then Select Mixed Mode Authentication.
Under the Domain name, add the domain name and then click Validate.
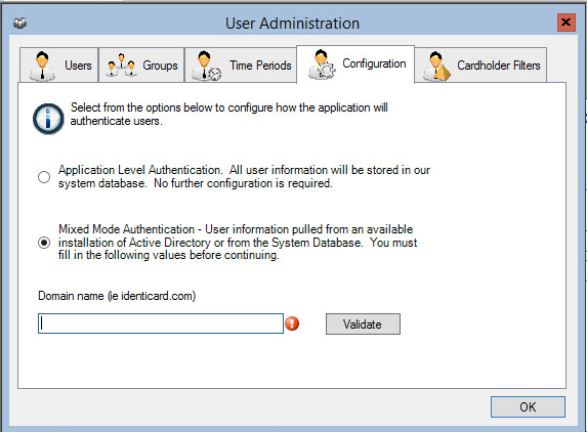
Message should be Active Directory Validated.
After active directory is validated, go back to the Users tab.
Now, when clicking on the Add button you will see ‘Add LDAP User’ and ‘Add Application User.’
Select Add Application User to add user as outlined in the steps above. Select Add LDAP User to add a user that you want to log in using their Windows credentials.
Go to the Group Membership tab. Check the box the user is to be in. Go back to the User Information tab.
Type in the person’s Windows username. Click Search. If the person’s username is found in active directory it will be seen under Search Results. Select the username by clicking on it. Activation and Expires dates are optional. Select the Default Screen Design. Then click OK.
That person will now be able to log in to PremiSys using their Windows credentials.