How to add an Elevator in PremiSys.

Adding an Elevator in PremiSys.
You will add your hardware into Premisys the PremiSys site tree. Once the hardware is added it will auto-generate the Doors under the doors folder. We have to delete one of the doors that were just added to make this an elevator. This process is explained below.
1. Open the Hardware config and go to the doors folder and delete the door that was auto-generated that you would like to use for the elevator. Double click the doors folder and then right-click and delete the door you would like to use for the elevator.
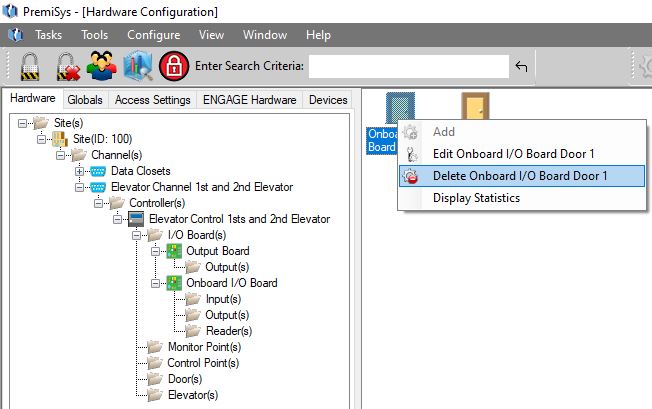
2. You will get a pop-up window asking to confirm the deletion of the door. Click OK.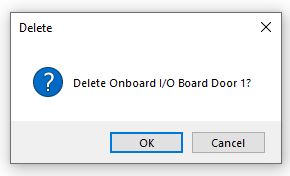
3. Download required after deleting door window. Click Manually download later.
Repeat steps 1-3 to delete all of the additional doors' readers you will need for elevator access.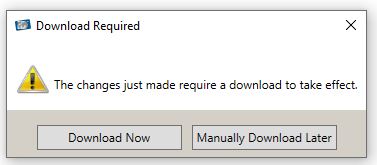
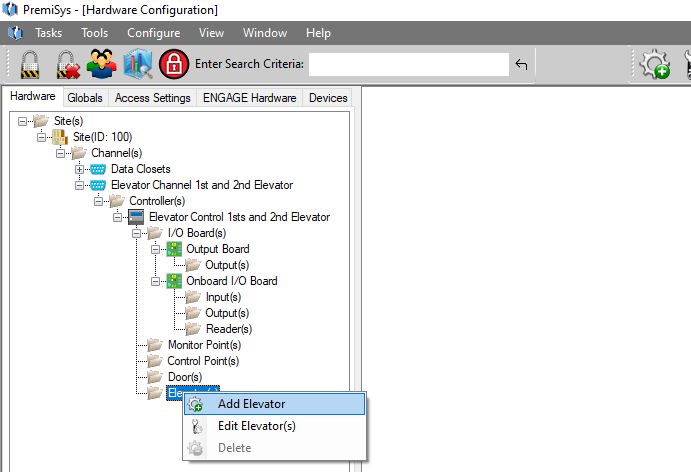
4. Now the door(s) are deleted we can add an elevator. Under hardware configuration, right-click the elevator folder and select add elevator.
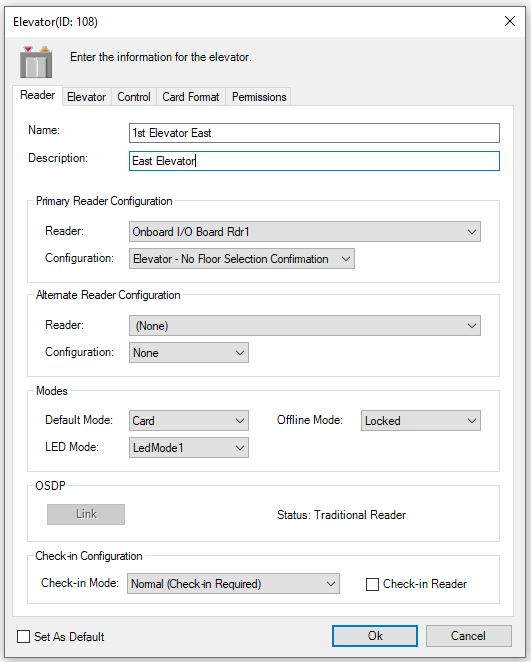
5. The elevator configuration window opens to the "Reader Tab" Name your elevator and select a reader. You will also select your elevator configuration here. ( No floor selection or Floor Selection Confirmation.)
No-floor selection = only outputs(relays) are needed for elevator floors. - Most configurations.
Floor Selection Confirmation = You will need outputs(relays) needed for elevator floors and also Inputs for the elevator buttons.
6. Elevator Tab - In this section, you will add the first relay in consecutive order. You then select the number of floors you will need. In my example, I am using a 16 output board. I am going to start with K1 for the first floor.
Select the first relay for the elevator to use. This relay will represent your first floor.
Set the number of floors. (128 is the max)

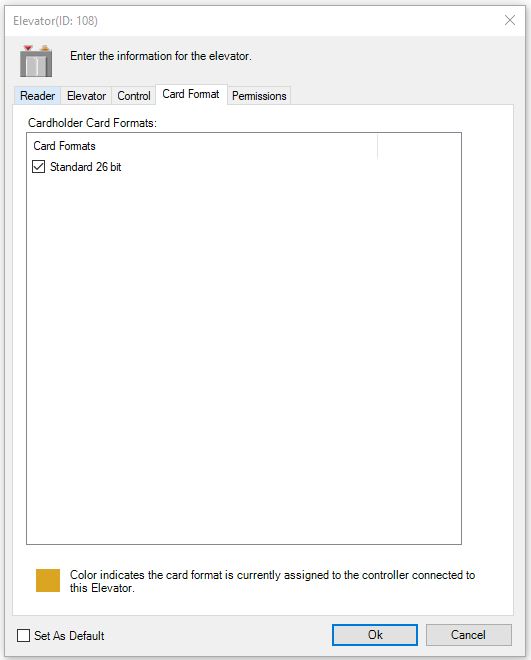
7. Click the Card Format tab.
Select the card format the elevator reader will use.
Click Ok to the window and the Elevator is now added.