Configure Morpho Manager for Fingerprint only

Configure Morpho Manager for Fingerprint only
These items will need to be setup in MorphoManager in order to configure the BioBridge.
1. Wiegand Profiles
2. Biometric Device Profiles
3. Biometric Device
4. User Policy
5. User Distribution Group
6. BioBridge System Configuration
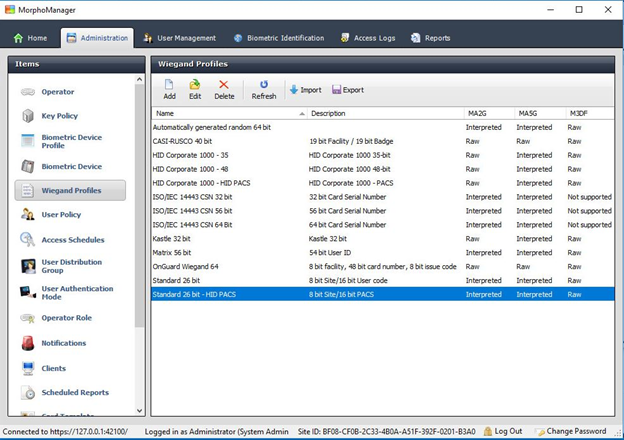
Wiegand Profiles
The wiegand profile is used to output over the wiegand out interface of the Morpho reader when a user is identified.
There are 13 different wiegand profiles to choose from. You can add your own if you format is not listed. You can also add a site code to the standard 26 bit format if you need to define a site code.
Note*** You will set the wiegand profile in the User Policy and the Biometric Device Profile later on when setting up those sections.
Biometric Device Profile
The biometric device profile will define common settings and parameters for one or more biometric devices.
In this example we will setup the BDP (Biometric Device Profile) Items mentioned below will need to be setup if the item is not mentioned below leave set for the default settings.
1. Click Administration and then click Biometric Device Profile. Highlight default and select edit.
2. NAME: Enter a name for your BDP or leave it set for default.
3. CONFIGERATION MODE: Express
4. LOG RETRIVAL ENABLED: Checked
5. KEY POLICY: Default
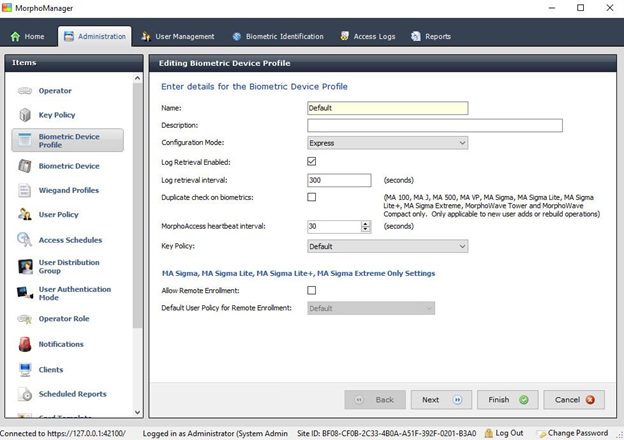
6. Click Next, This will take you to page 2 Biometric Device settings.
7. Select Standard 26 Bit as your wiegand profile. Leave the rest of the settings default.
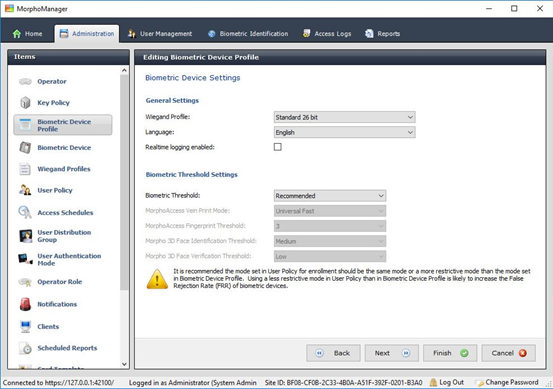
8. Click Next. This will take you to Page 3 Multi-Factor Mode Settings.
9. MULTI-FACTOR MODE: Biometric Only
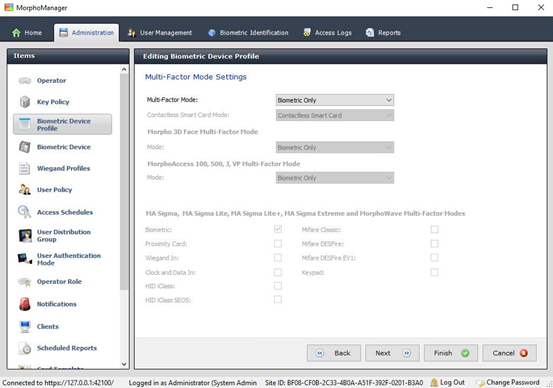
10. Click Next, this will take you to Page 4 Access Control Mode Settings.
11. ACCESS CONTROL MODE: INTEGRATED
12. Wiegand OUT Enabled: Checked
13. Leave the rest of the settings set for the defaults
14. Click Finish we have what we need for the BDP.
Biometric Device(s)
This section you will add your biometric devices that have already been configured with an IP address.
1. Click Administration and then click Biometric Device under Items on the left.
2. Click Add under the Biometric Device window.
3. Type in a Device Name
4. Select your Timezone
5. Select you Hardware Family
6. Set your IP Address.
7. Leave the Port Set as: 11010
8. Select the Biometric Device Profile you setup.
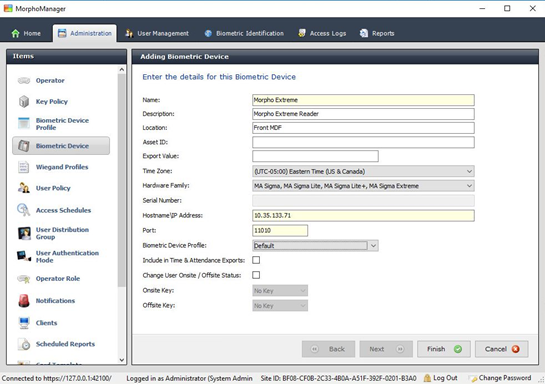
9. Click Finish.
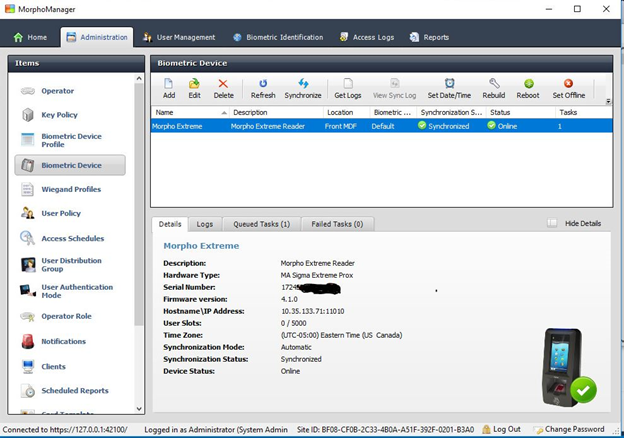
The Biometric device window with device(s) added and online.
User Policy
User policies are used to apply rights and rules to all members of the group. The Biobridge must use per user on the access mode. You cannot use all biometric devices and clients.
1. Click Administration and then click User policy on the left-hand side.
2. Edit the default entry.
3. Name the policy Fingerprint only.
4. Set the Access Mode to Per User.
5. Uncheck Allow MA 500 database selection during user enrollment.
6. Set the Wiegand Profile to the Standard 26 bit.
7. Uncheck the show photo capture page.
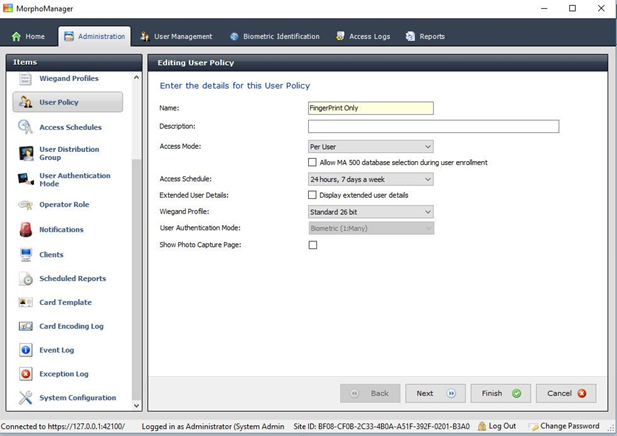
8. Click next to configure what fingers are enrolled and how many are required.
9. Click Finish.
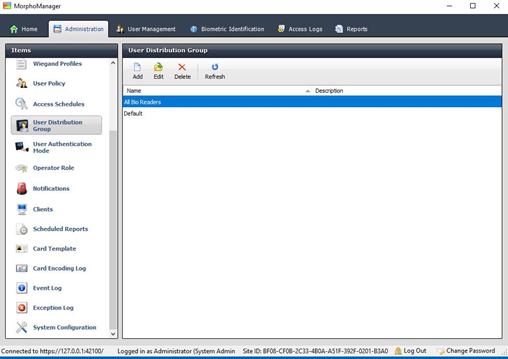
User Distribution Group.
User Distribution groups are designed to distribute users into groups. The access mode on the user policy must be set to per user. You will then be able to select the user distribution group mapped to the Access group in Premisys when we configure the BioBridge. ***You must add a group named Default in order for the BioBridge client to open from the fingerprint in Premisys***
Remember what ever groups you define here, will map out to the Access Group in Premisys.
1. Click Administration and then click User Distribution Group on the left-hand side.
2. Click Add.
3. You can create a group all readers. Enter: All Bio Readers as the name. You can add a description if you would like. Click next.
4. Check the checkbox for all the readers you would like to be part of the group. Click finish to create the group.
5. ***You must have a group named Default or the BioBridge client will not load from Premisys***
BioBridge System Configuration
The last step of setup is to configure the Universal BioBridge. This step will use the ODBC Data Source to connect to the Identicard_Biobridge database we created earlier in this guide. Click here for this step.
If you setup the ODBC earlier you can continue on to the next step, if not you will have to configure your ODBC connection now.
Configuring Universal BioBridge
1. Click Administration and then click System Configuration (at the bottom of the items list on the right-hand side.
2. Once in system configuration Click the BioBridge tab.
3. In the System dropdown box select: MorphoManager Universal BioBridge.

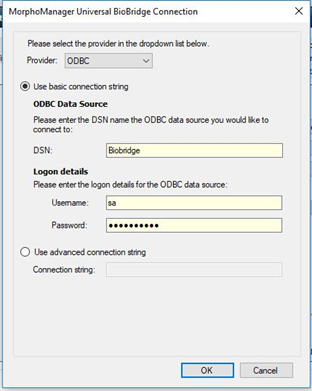
4. Click the Configure Connection button.
5. Enter in Biobridge for the DSN. Set your DSN if you named it something other than BioBridge.
6. Enter in your SQL Username and Password.
7. The BioBridge will be configurable now we setup the connection.
8. Select your Wiegand Profile that you have used previously.
9. Set your group Mode to Manual. Note if this is set for automatic the name of the Access group in Premisys must match the User Distribution Group in Morpho.
10. I would suggest leaving the User start and end time and also Leave the user cache schedule checked for everything. The cache schedule looks for new cardholders added in the PremiSys database and adds them into the BioBridge Client.
11. User Distribution Groups Mappings – Under this section you will map your access groups in PremiSys to the User distribution group in Premisys.
Enrolling a Biometric User through PremiSys.
The person being enrolled must have card number entered and saved into Premisys before you can enroll biometrics.